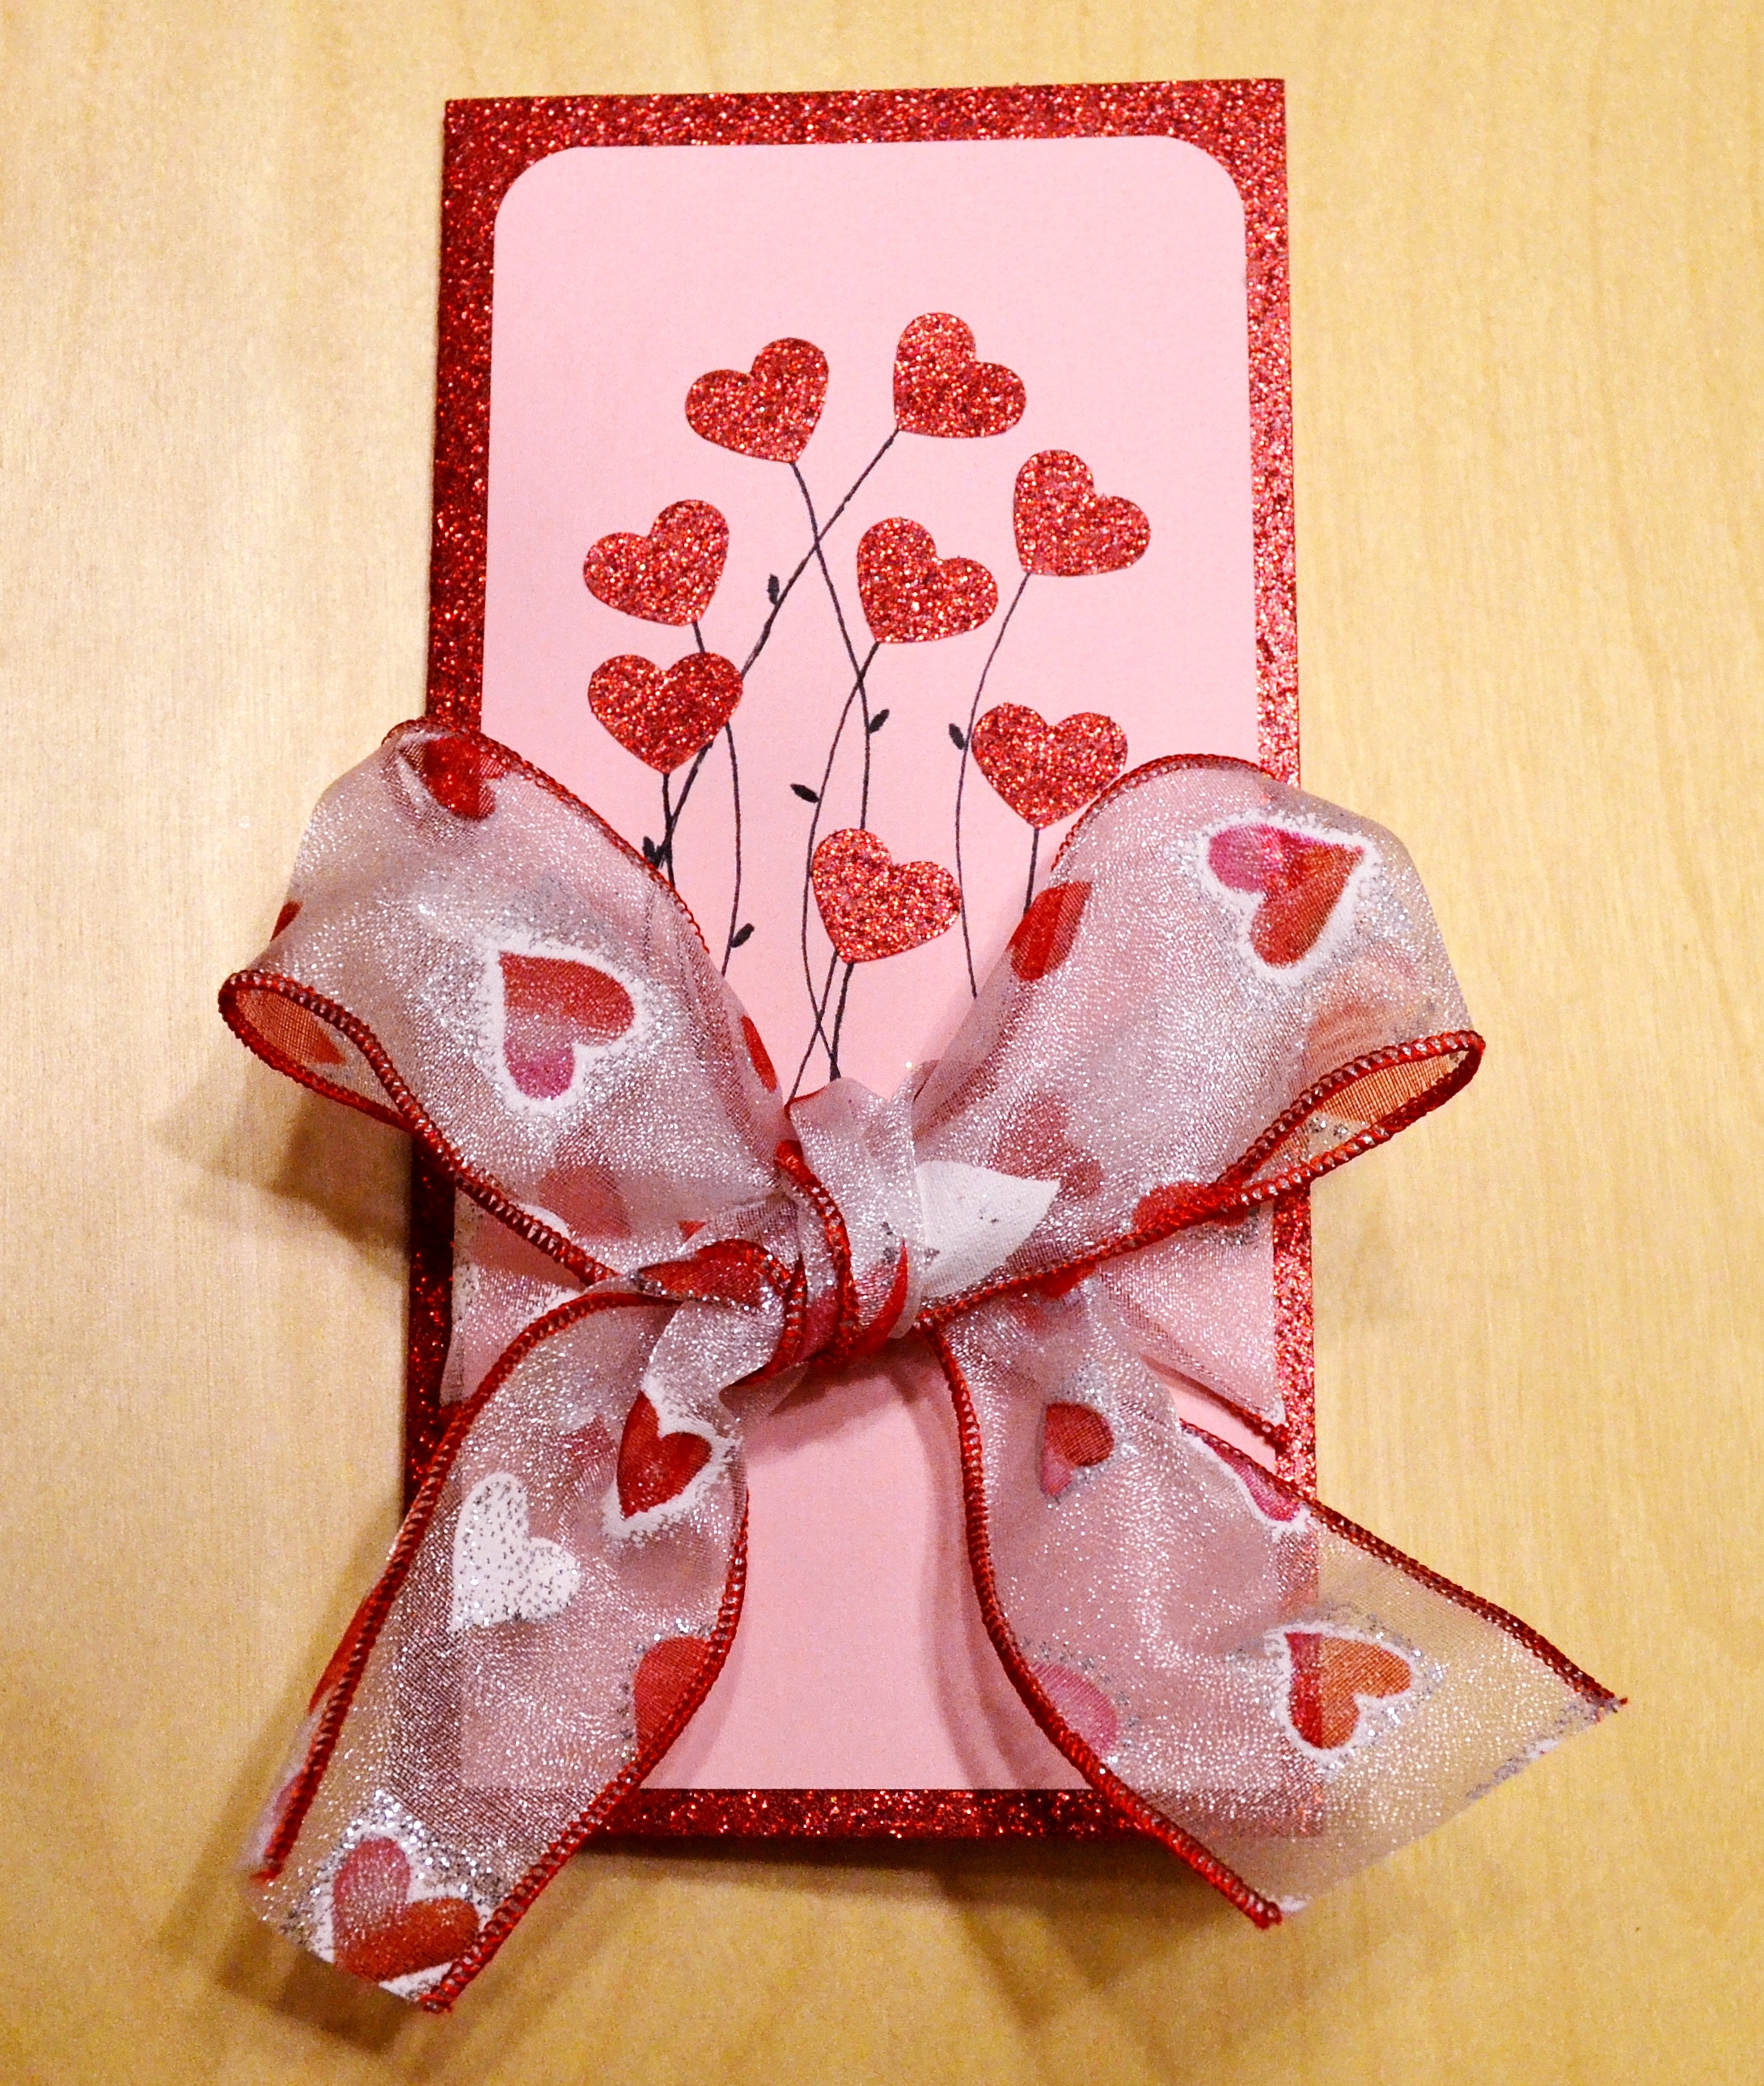
In an auction, Andrew and I won a paper embroidery lesson held at the teacher’s house. We’ve never really incorporated thread into our cards unless you count the floss threaded as dotted line trails in the Airplanes card. We spent two hours learning how to make the tulip card. This is the card I made:

Making a card like this isn’t very difficult once you know what to do and have the right supplies. You can start with a pattern like the one seen below.
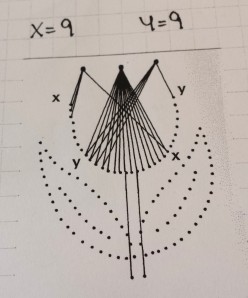
Our instructor punched out the pattern onto cardstock for us. It’s not difficult—you can just punch a pin through cardstock, using a pattern on top as a guide. Repeatedly gripping the pin and puncturing the paper can be a bit painful though after a while.
We picked the colors of thread we wanted. You can use one or more colors for the flower. Each piece of thread is composed of several strings raveled together. We unraveled this to get just one string, then threaded it through a needle. We then followed the pattern, as explained below.
Count nine dots down along the curve of the tulip’s flower. Starting through the back, pull the string through; you want only a single thickness of string. Before you pull it through completely, tape the string to the back of the card. Go up through the top point of the card, then go through the next hole toward and eventually past the center of the curve, until you get to the ninth hole down the other side. For the other two points, you again go through the ninth hole down, going up to the point on the opposite point of the curve. Study the picture or pattern closely before doing this, because one of the five students in our class had to start over twice because she didn’t get it quite right. If you start to run out of string, just tape the rest onto the back, get another piece of string, and continue from where you left off.
The stem and leaves are done by what I can best explain as a back stitch (but the underside of a back stitch). You want the any given point to be covered by string twice. This helps to hide the holes. I think I’m not great at explaining this, so I hope you can find something that works well for you.

Above is Andrew’s tulip. He chose a nice, vibrant red. Be careful not to tug too hard when pulling your string, or you might end up tearing the paper, as seen in the bottom-right of the flower part of Andrew’s design. He pulled so hard that one hole ripped. Also, if you pull too hard, you might make the holes bigger, causing them to stand out, as you can kinda see in my design at the top. Then again, you don’t want the string to be too loose.

Here are all five of the cards created in the paper embroidery class. I think it might be a complete coincidence that we each made a different-colored flower. Our instructor cut out the rest of the cardstock required for us to finish our cards, allowing us to finish putting them together. I think our cards all turned out great.
I enjoyed learning this new technique. It takes up a bit of time, but I like learning how to use different media besides cardstock in our cards. We might even incorporate it into our annual bulk Christmas card design. We’ve already discussed the possibility of using our die-cutter machine to make the holes in the cardstock for us, to speed up that one first step.


